2017. 9. 27.

[JavaScript] Learn ECMAscript 6 syntax with tower-of-babel

tower-of-babel

ES6 문법을 공부하기 위한 일종의 도구다. 주요 문법에 대해 배우고 예제도 풀 수 있다.

This is a sort of tool for studying. We can check the ES6 syntax and solve the series of exercises with tower-of-babel.

How to use?

$ npm install tower-of-babel -g
$ tower-of-babel

커맨드라인에 위와 같이 치면 된다. 간단하다. 물론 NodeJs를 설치한 환경이어야 한다. 깔려있지 않다면 https://nodejs.org/ 에서 설치하고 오자. 

Just type upper. (-g option is for global installing, So you can generate it any directory) And you had to installed NodeJs. if you not, go here and install it. https://nodejs.org/


이후부터는 babel 환경세팅을 하고 차근차근 배우면 끝.
After setting up the babel environment and just learn step by step.

Answers of each exercise

어쨌든 예제를 푸는 거니까 각자의 답이 존재한다. 그래서 나는 이렇게 했을 뿐이지 꼭 이래야 하는 건 아님.

Everyone has their own answers of each exercise. So this is not the perfectly correct answer. those are just my answers.

1. Computed property

var evenOrOdd = 15, obj = {};
obj[(evenOrOdd => evenOrOdd % 2 === 0 ? "even" : "odd")()] = evenOrOdd;

//출력 (result)
{ odd: 15 }

프로퍼티에 식을 대입할 수 있다는 특징이다. 예제는 임의의 숫자가 홀수인지 짝수인지 구분하여 배열에 담아 출력하는 간단한 구문이다. 따라서 프로퍼티명에 즉시실행함수로 삼항연산자를 이용해 바로 홀짝인지 return하면 된다.

The question is checking the random number is even or odd and put it into the array. So return it with immediately invoked function and the ternary operator.

2. Iterator for of

var fizzBuzz = {
  [Symbol.iterator]() {
    let currentVal = 0, tempVal = 0;
    return {
      next() {
        if(currentVal >= 30) return {done:true};
          [currentVal] = [currentVal + 1];
          return {done:false, value:(() => {
            if(currentVal % 3 == 0 && currentVal % 5 == 0) {
              return "FizzBuzz";
            } else if(currentVal % 5 == 0) {
              return "Buzz";
            } else if(currentVal % 3 == 0) {
              return "Fizz";
            } else {
              return currentVal;
            }
          })()};
      }
    }
  }
}

for(let n of fizzBuzz) {
  console.log(n);
}

//출력 (result)
1        
2        
Fizz     
4        
Buzz     
Fizz     
7        
8        
Fizz     
Buzz     
11       
Fizz     
13       
14       
FizzBuzz 
16       
17       
Fizz     
19       
Buzz     
Fizz     
22       
23       
Fizz     
Buzz     
26       
Fizz     
28       
29       
FizzBuzz 
31       

for ~ of에서는 iterable한 것이면 뭐든지 넘겨서 반복시킬 수 있다. 그리고 Symbol.iterator 구문을 이용하면 해당 스코프를 iterator로 만들 수 있고, next()는 자동으로 다음 순서로 넘어가게 해준다. next()는 done 프로퍼티가 true가 되면 멈춘다. 이를 이용해 FizzBuzz 프로그램을 만들었다.

Can make the iterator of whatever is iterable in for ~ of, with Symboe.iterator statement. next() jump to next automatically. this will be break when the 'done' property is true.

3. Generator

let fizzBuzz2 = function*() {
  let currentVal = 0;

  while(currentVal < 30) {
    [currentVal] = [currentVal + 1];
    if((currentVal % 3 == 0) && (currentVal % 5 == 0)) {
      yield "FizzBuzz";
    } else if(currentVal % 5 == 0) {
      yield "Buzz";
    } else if(currentVal % 3 == 0) {
      yield "Fizz";
    } else {
      yield currentVal;
    }
  }
}();

for(let n of fizzBuzz2) {
  console.log(n);
}

//출력 (result)
1        
2        
Fizz     
4        
Buzz     
Fizz     
7        
8        
Fizz     
Buzz     
11       
Fizz     
13       
14       
FizzBuzz 
16       
17       
Fizz     
19       
Buzz     
Fizz     
22       
23       
Fizz     
Buzz     
26       
Fizz     
28       
29       
FizzBuzz 
31       
Symbol.Iterator를 사용한 FizzBuzz 프로그램에 Generator 구문을 씌운 것이다. function옆에 *를 붙여 선언한다. 

Refactoring the FizzBuzz program using Symbol.Iterator to Generator. Initializing with * next to function like 'function*'.

4. Arrow function

var inputs = ["Forever", "Ur", "Continuous", "Korea"];
var result = inputs.map(inputs => inputs.charAt(0)).reduce((pre, cur) => `${pre}.${cur}`);

//출력 (result)
F.U.C.K
익명함수들은 화살표를 이용해 만들 수 있게 되었다. 일종의 문법조미료임. 임의의 스트링 배열의 각 요소에서 0번째를 거른 후에 이를 모두 합치는 프로그램이다.

This is a sort of sugar syntax. we can change the anonymous function to arrow function. Map the 0 index of each attribute of the array and combine it with reduce().

5. Rest and spread

var arr = `10,50,15,11,42,56,39,21`.split(",");
arr = arr.map(arr => +arr);

var avg = function(...arr) {
  return arr.reduce((pre, cur) => Math.ceil((pre + cur) / 2));
}

avg(...arr);

//출력 (result)
31
배열의 길이가 가변적일 때는 Spread operator(...)를 사용한다. 이렇게 넘긴 배열을 rest parameter라고 한다. 그냥 argument로  넘겨주면, 이는 배열이 아니라 배열처럼 보이게 넘어온 것일 뿐이다. 따라서 가변적인 배열은 rest parameter로 명시해서 배열로 다루자.

Using spread operator when the length of array is variadic. It called rest parameter. It is just the object looks like an array when send the parameter to argument. Therefore the variadic array is sure to be specified to rest parameter with '...'

2017. 8. 29.

[HTML] fabricJs, the canvas library

1. Why the fabric.js? is the nom nom snack?


: Canvas is the powerful element on html5. but this is a little bit... fussy to use. we need to calculate x, y, width, height, and whatever on the canvas. So It is more good to our mental health to put a library like fabricJs onto the canvas.

2. Start with chewing fabricJs


(javascript)

(function() {
  var canvas2dBackend = new fabric.Canvas2dFilterBackend();
  var canvas = this.__canvas = new fabric.Canvas('c');
  var f = fabric.Image.filters;
 
  //Padding top, left, right, bottom from image.
  fabric.Object.prototype.padding = 5;

  //Make transparent the corners can resize the image.
  fabric.Object.prototype.transparentCorners = false;

  //Apply filter with canvas2d way.
  fabric.filterBackend = canvas2dBackend;
 
  //Set image from url(or directory path) and callback function.
  fabric.Image.fromURL('http://i.imgur.com/jZsNUCi.jpg', function(img) {
    img.scale(0.2).set({
      name: 'main'
      , left: canvas.width / 2 - (img.width / 8)
      , top: canvas.height / 2 - (img.height / 8)
    });
    canvas.add(img);
  });
})();

(html)

<!DOCTYPE html>
<html lang="ko">
<head>
  <script src="https://rawgit.com/kangax/fabric.js/master/dist/fabric.js"></script>
  <style>
    body { margin:0; padding:0; overflow:scroll; background-color:#F0F0F0; }
    .canvas-container { display: inline-block; vertical-align: top; }
    .c-box { border:1px sold #aaa; }
  </style>
</head>
<body>
   <canvas class="c-box" id="c" width="1400" height="850"></canvas>
</body>
</html>


3. More yummy function? HERE YOU ARE!


-watermark (In fact, more like image blending by grouping)

//Get the image, not a watermark image
function getImageObject() {
  var activeObj = canvas.getActiveObject();
  var imageName = null;
  var returnObj = null;
  
  canvas.getObjects().map(function(obj){
    imageName = obj.name || "";
    if(obj.isType("image") && imageName != "watermark") {
      returnObj = obj;
    }
  });
    
  return returnObj;
}
//Get the watermark image
function getWatermarkObject(){
  var imgObj = null;
   
  canvas.getObjects().map(function(obj){
    if(obj.name == "watermark"){
      imgObj = obj;
    }
  });
   
  return imgObj;
}
function insertWatermarkImage() {
  var watermark = new Image();

  canvas.remove(getWatermarkObject());

  //Set the image with url source or directory path
  watermark.src = 'https://rawgit.com/kangax/fabric.js/master/dist/fabric.js';
  watermark.onload = function() {
    var imgInstance = new fabric.Image(this, {
    name : "watermark",
    hasControls : true,
    lockMovementX : false,
    lockMovementY : false
  });
   
  var activeObj = getImageObject();
  var imageTop = activeObj.top < 0 ? 0 : activeObj.top;
  var imageLeft = activeObj.left < 0 ? 0 : activeObj.left;
  var imageWidth = activeObj.width;
  var imageHeight = activeObj.height;
    
  imgInstance.set({
    top : imageTop,
    left : imageLeft,
    scaleX: 0.1,
    scaleY: 0.1,
    opacity: 0.5
  });
  
  //Set this imageInstance to active object on the current canvas.
  canvas.add(imgInstance).setActiveObject(imgInstance);

  //Need to call this function after all canvas changing.
  canvas.renderAll();
  }
}
function grouping(){
  var objs = [];
  var groupObj = null;
   
  //Put all objects into the array.
  objs = canvas._objects.filter(function(obj){
    return obj;
  });
   
  //Clear canvas.
  canvas.clear();
   
  //Grouping.
  groupObj = new fabric.Group(objs,{});

  //Transfer this group to new fabric image.
  groupObj.cloneAsImage(function(o) {
    canvas.add(o);
    o.center();
    o.setCoords();
  });
   
  canvas.renderAll();
}


- Variable filters

function getFilter(index) {
  var obj = canvas.getActiveObject() || getImageObject();

  return obj.filters[index];
}
function applyFilter(index, filter) {
  var obj = canvas.getActiveObject() || getImageObject();

  obj.filters[index] = filter;
  obj.applyFilters();
  canvas.renderAll();
}
function applyFilterValue(index, prop, value) {
  var obj = canvas.getActiveObject() || getImageObject();
  
  if (obj.filters[index]) {
    obj.filters[index][prop] = value;
    obj.applyFilters();
    canvas.renderAll();
  }
}
var $ = function(id){return document.getElementById(id)};

$('brightness').onclick = function () {
  applyFilter(5, this.checked && new f.Brightness({
    brightness: parseFloat($('#brightness-value').val())
  }));
};
  
$('brightness-value').oninput = function() {
  applyFilterValue(5, 'brightness', parseFloat(this.value));
};

$('contrast').onclick = function () {
  applyFilter(6, this.checked && new f.Contrast({
    contrast: parseFloat($('contrast-value').value)
  }));
};

...

- Check here if you want to know more information about fabric filter
http://fabricjs.com/image-filters


2017. 8. 20.

[자작글] 글5

메이크업의 가장 중요한 요소는 피부를 어떻게 표현하느냐, 입니다. 프라이머로 모공을 메우고, 그 위에 파운데이션을 올려봅시다. 매끄럽게 정돈된 피부가 보이시죠? , 칙칙한 부위나 붉은 자국이 있는 부분은 보색으로 톤보정을 해주는 것도 잊지 마세요. 그래야 좀 더 균일한 피부가 된답니다. 참고로 노란색이나 초록색은 붉은 톤을 잡아주고, 분홍색은 푸르고 창백한 톤을 잡아줍니다. 사실 어떤 도구를 이용하는지도 완벽한 피부 표현에 있어서 중요한 요소입니다. 모가 길든 짧든 파운데이션용 브러쉬는 무조건 탱탱해야 합니다. 포슬포슬한 브러쉬로는 사람의 잔주름들을 충분히 메꿀 수가 없거든요.

이렇게 몇 단계를 거친 피부를 보십시오. 윤기나고, 매끄럽고, 아름답죠? 조금 실망한 표정인데요. 그럴 수도 있죠. 이런 방식으로 피부가 하루아침에 바뀐다면 그건 마법이겠죠. 그럼 이건 어떠세요? 요즘 제가 밀고있는 방식인데, 이건 일반적인 메이크업 방법과는 약간 다릅니다. 조금 아플 수도 있어요. 하지만 정확히 59분만에 어떤 피부든 가장 완벽하게 매끄러운 상태로 만들 수 있다고 자부합니다. 한 시간만에 기적을 보실 수 있는 거예요. 어때요, 들어보시겠어요?

좋습니다. 그럼 일단 바늘이 필요한데요. 이 바늘로 피부의 모든 모공을 하나씩 찔러야 합니다. 걱정하지 마세요! 모공 크기보다도 작은 바늘이라 하나도 아프지 않답니다. 혹시 보톡스 주사 맞아본 적 있나요? 그거 맞을 때 아팠어요? 그렇죠? 아프지 않았죠? 주사바늘이 굉장히 가늘어서 그래요. 이 바늘도 마찬가지예요. 바늘을 찔러야 하는 이유요? , 사실 저만의 비법이라 알려주지 않으려고 했는데요. 피부만 정돈되면 너무 예쁘실 분이라서 말씀드릴게요.

사실 이 바늘은 일반적인 바늘은 아닙니다. 고체형 프라이머 알갱이가 씌워진 바늘이에요. 그래서 모공을 찌르기만 하는 것이 아니라 이 알갱이를 모공 속에 넣는 셈이 됩니다. 프라이머가 뭔지는 아시죠? , 그렇죠. 주 성분은 실리콘이고 피부표현에 들어가기 전에 모공과 잔주름을 메워주는 역할을 하죠. 그래서 모든 모공에 이 고체형 프라이머를 넣고 파운데이션을 바르면 모공 따위가 보일 틈조차 생기지 않는 거예요. 이제 이해가 되시나요? 피부에 나쁘겠다고요? 그것도 걱정하지 마세요. 모공은 일반적으로 분비물이 배출되는 곳입니다. 들어가는 곳이 아니죠. 그래서 모공이 프라이머 알갱이를 계속 밀어내기 때문에 유분으로 화장이 무너질 때 함께 빠져나오게 됩니다. 그래서 최대 6시간밖에 버티지 못해요. 그러니까 6시간 이내에 완벽한 피부를 보여줘야 할 때는 유용한 화장 방법인 거죠. , 어때요? 이 방법으로 메이크업 한번 받아보실래요?

역시 그럴 줄 알았어요. 후회하지 않으실 거에요. 자 그럼 시작해볼까요? 일단 고체형 프라이머를 가져올게요. 궁금해하시는 것 같아서 보여드릴게요. 어때요? 알갱이라고 할 수도 없을 만큼 작죠? 아까는 조금 의아한 표정이었는데, 보여드리니까 확실히 표정이 밝네요! 그럼 시작할게요.

아프진 않으시죠? 조금만 있으면 끝나요~ , 그런데 아까부터 말씀드리고 싶었는데 혹시 XX중학교 3학년 3반 아니셨어요? 아무리 봐도 제가 알던 친구랑 비슷하게 생기시고, 이름도 똑같아서요. 맞아요? , 이런 우연도 다 있네요. 그 당시에 제가 거기 살다가 다른 지역으로 이사했거든요. 여기서 꽤 먼 지역에 있던 학교인데, 여기까지 와서 보다니 진짜 우연이 아니라 운명인가봐요, 그렇죠?

그때는 참친구들도 저도 어렸어요. 같이 다니던 무리가 있었는데 학교에서 친구들 돈을 뺏거나 괴롭히고 다녔거든요. 그리고 같은 반에 진~짜 여드름이 많았던 애가 한 명 있었는데, 거의 학교에서 걔 괴롭히는 게 일상이었어요. 사실 말하기 조금 민망할 정도로 나쁜 짓이긴 한데요. 언제는 친구들끼리 걔 얼굴에 있던 여드름을 다 터트리면서 개수를 세어본 적도 있어요. 거짓말 안하고 한 150개는 있었어요. 바늘로 여드름을 하나하나 찌를 때마다 묘한 쾌감도 있더라고요. 그래서 원래 한번만 찔러보고 말자고 했었는데, 제가 너무 재밌어서 계속 찌르다가 전부 터트려버렸어요. 다 하고 나니까 걔 얼굴이 거의 곰보에 피범벅이 되었더라고요. 그리고 다음 날 걔가 학교에 안 나왔는데, 졸업할 때까지도 나오지 않았어요. 제가 많이 어렸어요지금 생각해보니까 솔직히 많이 심했어요. 그치? 너 그때 찢어 죽여버리고 싶었어.

, 꿀꿀한 얘기는 그만 하고. 내가 아까 59분이면 다 끝난다고 했지? 다 됐네? 근데 왜 1시간도 아니고 59분인 줄 알아? 사실 완벽하게 밀착되려면 1분은 더 걸리긴 해. 59분동안 모공에 넣고, 1분동안은 너 구경해야 되거든. 그거 알아? 벌써 너 모공 존나 커지고 있어. 모공에 넣은 거 1시간 지나면 팽창해서 터져. 이 기계가 1초에 5번 정도는 찌르니까 17,000개 정도는 얼굴에 박혔겠네?

그때 나 무지 아팠어게다가 무슨 드러운 바늘을 구했는지 얼굴에 온갖 세균이 감염되서 병원다녔어그래서 전학까지 갔잖아넌 그때 어땠어? 곰보 빵같이 생겼다고 사진 찍었던 건 지웠어? 대답해봐, ? 곰보같이 생긴 게.


<Beauty, >

2017. 8. 16.

[nodeJs] JUST starting electron with node.js

심심해서 말로만 듣던 일렉트론으로 간단한 프로그램을 만들었다. 거창한 건 아니고, 특정일로부터 날짜 계산기..... node.js와 electron 둘다 처음 해보는 거라 컴파일 옵션같은 것은 신경안썼다. 일단 노드와 일렉트론 둘다 최신 release 버전을 다운받았다. 셋업방법 및 환경설정 등은 공식 문서에 잘 나와있으니까 설명 안함.

I made a simple program, 'D-Day Calculator', with electronJs. I didn't mind about compile options or whatever like that additional things since I was dealing with nodeJs and electronJs first time ever! Firstly, I download latest version of those. and... I will not explain environment setup anymore because documents are better than me.


1. 폴더생성 (new directory) 

Generally, an Electron app is structured like this:
your-app/
├── package.json
├── main.js
└── index.html

일렉트론 문서에 나온대로 디렉토리를 생성해준다. package.json의 내용은 아래와 같다.
Create new directory like that. The contents of package.json is like this :

{
  "name"    : "your-app",
  "version" : "0.1.0",
  "main"    : "main.js"
}

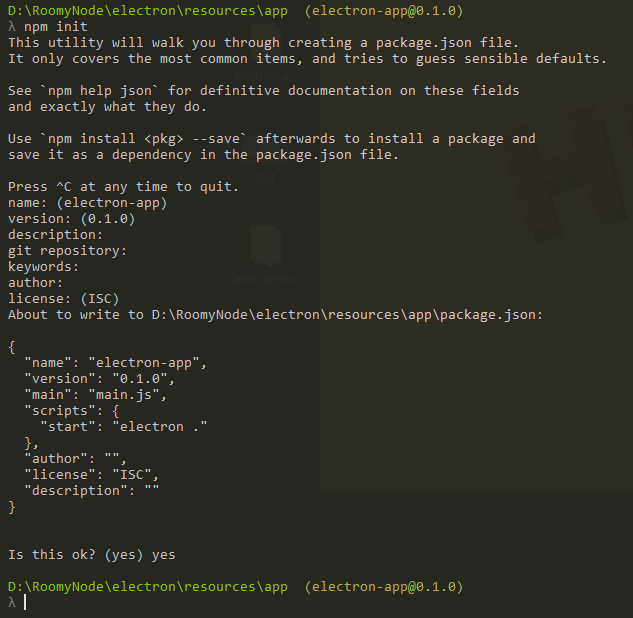
package.json은 cmd에서 해당 폴더(your-app)위치에서 'npm init'명령어로 자동생성할 수 있다. 참고로 scripts의 start를 지정해놓으면 'npm start'로 프로젝트를 기동할 수 있다.

We can create package.json automatically with 'npm init' on your-app folder like this :
(The 'scripts' attribute means user-customizing-command like 'start'. So, if you set 'electron .', then you can generate electron project on current folder.)


메인이 되는 javascript와 html파일은 공식문서를 참조했다.
The main.js should create windows and handle system events, a typical example being:
const {app, BrowserWindow} = require('electron')
const path = require('path')
const url = require('url')

// Keep a global reference of the window object, if you don't, the window will
// be closed automatically when the JavaScript object is garbage collected.
let win

function createWindow () {
  // Create the browser window.
  win = new BrowserWindow({width: 800, height: 600})

  // and load the index.html of the app.
  win.loadURL(url.format({
    pathname: path.join(__dirname, 'index.html'),
    protocol: 'file:',
    slashes: true
  }))

  // Open the DevTools.
  win.webContents.openDevTools()

  // Emitted when the window is closed.
  win.on('closed', () => {
    // Dereference the window object, usually you would store windows
    // in an array if your app supports multi windows, this is the time
    // when you should delete the corresponding element.
    win = null
  })
}

// This method will be called when Electron has finished
// initialization and is ready to create browser windows.
// Some APIs can only be used after this event occurs.
app.on('ready', createWindow)

// Quit when all windows are closed.
app.on('window-all-closed', () => {
  // On macOS it is common for applications and their menu bar
  // to stay active until the user quits explicitly with Cmd + Q
  if (process.platform !== 'darwin') {
    app.quit()
  }
})

app.on('activate', () => {
  // On macOS it's common to re-create a window in the app when the
  // dock icon is clicked and there are no other windows open.
  if (win === null) {
    createWindow()
  }
})

// In this file you can include the rest of your app's specific main process
// code. You can also put them in separate files and require them here.

index.html 파일은 내가 날짜 계산기를 만들었으므로 문서와 다름.
index.html file is different with electron doc's, bcuz mine is simple day calc.

<!DOCTYPE html>
<html>
 <head>
  <meta charset="utf-8"/>
  <link type="text/css" rel="stylesheet" href="./css/haha.css"/>
  <title Calculator</title>
  <script type="text/javascript">
    window.onload = function() {
      let lc = document.getElementById("calc");
      let sDay = new Date('날짜').getTime();
      let today = new Date().getTime();

      lc.innerHTML = Math.ceil((today - sDay)/1000/60/60/24);
    }
  </script>
 </head>
 <body>
   <br/><br/><br/><br/><br/>
   <div id="calc"></div>
   <center일 되었습니다.</center>
   <!-- <canvas id="canvas" width="500" height="500"></canvas> -->
 </body>
</html>

haha.css는 아래와 같이 만듬.
haha.css is like this :

@charset "utf-8";
@import url(http://fonts.googleapis.com/earlyaccess/nanumgothic.css);

body{font-family:'Nanum Gothic'; background-color: #44B292;}
center{font-size: 50px; font-weight: bold; color: #F8FCF7;}

#calc{margin:auto; width: 50%; padding: 10px; text-align: center; font-size: 110px; font-weight: bold; color: #F9EAF4;}


2. 일렉트론 실행 (Run the app)

package.json에 'start'명령어를 지정했었다면 커맨드라인에 'npm start'라고 쳐보자.
(그런거 안했으면 그냥 만든 앱 디렉토리에서 'electron .'혹은 'electron main'으로 실행)

Type 'npm start' on the command line if you set the 'start' scripts command.
(Or just type 'electron .' or 'electron main' -'main' is your javascript file name)


3. 데스크탑 프로그램으로 만들기 (Building macOS, exe, linux package)

electron-packager로 간단하게 일렉트론 프로젝트를 빌드할 수 있다. squirrel이나 grunt같은 플러그인들은 사용하지 않았다. 설치는 아래 문서가 잘 나와있으니 보고 따라하면 됨.

Building with electron-packager module. I didn't use other plugins like squirrel or grunt.

설치를 했으면 일렉트론앱을 만들었던 디렉토리에서 'electron-packager .'를 실행하자. 윈도우즈, 리눅스 등 다르게 빌드하고 싶을 때는 아래 옵션을 참고.

Build options are like this :

overwrite : 이미 빌드된 디렉토리가 있으면 덮어쓰기.
replaces any existing output directory when packaging.
platform : 어떤 플랫폼(linux, windows...)으로 빌드할 것인지.
The target platform to build for
arch : 빌드하는 플랫폼의 구조(32비트, 64비트...) 체계가 어떤지.
the architecture(32, 64bit...) to build for
icon: 아이콘 덮어씌우기. (디폴트는 일렉트론 로고)
sets the icon for the app(The default icon is electron logo)
prune: 불필요한 의존성 파일들을 모두 제거하고 빌드하기.
runs npm prune –production before packaging the app. It removes unnecesary packages.
out: 어떤 폴더에 빌드시킬 것인지.
the name of the directory where the packages are created.

examples are like this :

windows exe
electron-packager . --overwrite --asar=true --platform=win32 --arch=ia32 --icon=../icon.ico --prune=true --out=calc --version-string.ProductName="calc"
이때 --asar은 tar와 비슷한 파일포맷으로, 앱 소스를 바로 노출시키지 않게 했다. ia32는 Instruction Set Architecture의 32비트 버전을 의미한다.

--asar is a file format like 'tar', can hide sources of application. and ia32 is the 32-bit version of the x86 Instruction Set Architecture.


그러면 끝!
AND DONE!


2017. 7. 16.

[Tip] ISO-8859-1 and unicode

ISO-8859-1은 HTML 4.01의 기본 인코딩 문자이다. 이는 ASCII 문자열을 포함하고 있다. 마지막 숫자의 의미는 커버할 수 있는 문자열을 의미한다. 자세한 사항은 아래와 같다.


ISO-8859-1 is the default character in HTML 4.0.1. It contains numbers, upper and lowercase English letters, and some special characters like ASCII printable characters. The last number means languages. Details are like this : 

Character setDescriptionCovers
ISO-8859-1Latin alphabet part 1North America, Western Europe, Latin America, the Caribbean, Canada, Africa
ISO-8859-2Latin alphabet part 2Eastern Europe
ISO-8859-3Latin alphabet part 3SE Europe, Esperanto, miscellaneous others
ISO-8859-4Latin alphabet part 4Scandinavia/Baltics (and others not in ISO-8859-1)
ISO-8859-5Latin/Cyrillic part 5The languages that are using a Cyrillic alphabet such as Bulgarian, Belarusian, Russian and Macedonian
ISO-8859-6Latin/Arabic part 6The languages that are using the Arabic alphabet
ISO-8859-7Latin/Greek part 7The modern Greek language as well as mathematical symbols derived from the Greek
ISO-8859-8Latin/Hebrew part 8The languages that are using the Hebrew alphabet
ISO-8859-9Latin 5 part 9The Turkish language. Same as ISO-8859-1 except Turkish characters replace Icelandic ones
ISO-8859-10Latin 6 Lappish, Nordic, EskimoThe Nordic languages
ISO-8859-15Latin 9 (aka Latin 0)Similar to ISO-8859-1 but replaces some less common symbols with the euro sign and some other missing characters
ISO-2022-JPLatin/Japanese part 1The Japanese language
ISO-2022-JP-2Latin/Japanese part 2The Japanese language
ISO-2022-KRLatin/Korean part 1The Korean language


서유럽 문자인 ISO-8859-1이 HTML 표준 인코딩셋이기 때문에, http 통신을 할 때 request에 들어있는 한글 파라미터는 당연히 깨진다. 따라서 UTF-8 유니코드 인코딩셋으로 변환해줘야 한다.  이때 유니코드는 위의 ASCII의 문제점이 있기 때문에 나온 방식이다. 전 세계의 모든 문자열을 인코딩하기 위해 만들어졌다.

So, a korean parameter cannot be transfer well from request object while interchaging HTTP. For this reason, you have to transfer it to unicode encoding. Unicode is a computing industry standard for the consistent encoding, representation, and handling of text expressed in most of the world's writing systems.